清水建築 動画背景 ストライプ MAC BOOK とipadで ストライプがきれいに出ない 重なったり違和感問題の解決方法

サイズ、svgに変換等しても解決ならず、

ちなみに、ユーザーエージェント分岐を入れたが、なぜかipadで背景変わらなかった

クロームのユーザーエージェント偽装ではうまくいってたが、

ヘッダー

<?php
$ua = $_SERVER['HTTP_USER_AGENT'];
if ((strpos($ua, 'Android') !== false) && (strpos($ua, 'Mobile') !== false) || (strpos($ua, 'iPhone') !== false) || (strpos($ua, 'Windows Phone') !== false)) {
  //スマホ用CSSを読み込む ?>

  <link href="<?php echo get_template_directory_uri(); ?>/mobile.css" rel="stylesheet" type="text/css" />

<?php } elseif ((strpos($ua, 'Android') !== false) || (strpos($ua, 'iPad') !== false)) {  
    //タブレット用CSSを読み込む?>

 
  <link href="<?php echo get_template_directory_uri(); ?>/tablet.css" rel="stylesheet" type="text/css" />

<?php } else { 
    //PC用CSSを読み込む ?>


<?php } ?>


css

@charset "utf-8";


/* .video-wrap {
    .pattern {


        background-image: url(/wp-content/themes/newD-child/img/bg/kv_bg.png);
        background-size: 6px 6px;
        background-repeat: repeat;

    }} */


そんで、結局、

画像に隙間をつくることで なんとか重なりを軽減

ipad macbook は多分、無理くり解像度を出してるので、

ピクセルが合わないのではないかと思われる

10px 20px このsvgを


  .pattern {
    width: 100%;
    height: 100%;
    pointer-events: none;
    
  //background-image: url(/wp-content/themes/newD-child/img/bg/yokojima.svg);
  background-image: url(/wp-content/themes/newD-child/img/bg/yokojima_10.svg);
 background-size: 1px 3px;
  background-repeat: repeat;
  
    //position: fixed;
  position: absolute;
  z-index: 2;
  filter: opacity(60%);

  @media screen and (max-width: 736px){

    background-image: url(/wp-content/themes/newD-child/img/bg/yokojima_mob.png);
    filter: opacity(100%);

    //background-size: 1px 2px;//横 縦
    background-repeat: repeat;
}//@media screen 736px

これが今の正解

モバイルは分岐

それ以外はすべて 1px 3pxに変更した上記svgです。

swiper 複数使うときの まとめ 扱いやすく マスター 苦手意識 消す

まず、必要なのは、

フッターに これがjs

<?php //スワイパー 
///実際のコンテンツより下でないと下でないと機能しないのでフッター
?>

<script src="<?php echo get_stylesheet_directory_uri(); ?>/2_head/swiper/swiper-bundle.min.js"></script>


そして、この下にそれぞれのスワイパーの設定を書いていく。 ポイントは

const swiper_youtube = new Swiper(“.swiper_youtube”, {

両方とも変える 独自なものに

<script>
const swiper_youtube = new Swiper(".swiper_youtube", {
//こっちがモバイル 兼 PC
slidesPerView: 1,/* コンテナ内に表示させるスライド数 */
  //slidesPerView: 1.45, // コンテナ内に表示させるスライド数(CSSでサイズ指定する場合は 'auto')
  //centeredSlides: true, // アクティブなスライドを中央に配置する
  //spaceBetween: 32, // スライド間の余白(px)
  // loop: true,
  speed:1000,//矢印クリック 自動再生で 動く速度 多いほうが遅く
  //initialSlide: -1,// 0スタートで表示順調整

  // autoplay: {
  //   delay: 3000, // スライドの自動再生速度調整 2000 = 2秒
  //   disableOnInteraction: false,
  //   resistanceRatio:0.1,
  // },
  
  breakpoints: { // こっちがPC
      737: { // 画面幅px以上で適用 ブレークポイント
     slidesPerView: 'auto', //autoにするとcssで指定したサイズで表示
      //slidesPerView: 3,
        //spaceBetween: 0, // スライド間の余白(px)
      
    }
  },
  
// ページネーション
// pagination: {
//     el: ".swiper-pagination",
//     clickable: true,
//   },
  // 前後の矢印
  navigation: {
    nextEl: ".swiper-button-next",//このクラスがあればそこがナビになる
    prevEl: ".swiper-button-prev",//このクラスがあればそこがナビになる
    
  },
});
</script>


そんで、今回間違えたが、

スワイパーを実際設置するところで swiper swiper_youtube とswiperも生きで、独自のスワイパークラスを追加すること

また、書くcssを変更したいためにスワイパーの大枠をyoutube_swipwe_wrapで囲う

<div class="youtube_swipwe_wrap">

<div class="swiper_wrap_wrap">
    <div class="swiper swiper_youtube">
  <!-- 必要に応じたwrapper -->
  <div class="swiper-wrapper">
    <!-- スライド -->

    <div class="swiper-slide"><div class="youtube_box">
        <iframe width="560" height="315" src="https://www.youtube.com/embed/-pkaJrrotRY?si=z9rdrhs1NAK-lpt8" title="YouTube video player" frameborder="0" allow="accelerometer; autoplay; clipboard-write; encrypted-media; gyroscope; picture-in-picture; web-share" allowfullscreen></iframe></div></div>

    <div class="swiper-slide">
    <div class="youtube_box">
<iframe width="560" height="315" src="https://www.youtube.com/embed/AMu3zeWWAP4" title="YouTube video player" frameborder="0" allow="accelerometer; autoplay; clipboard-write; encrypted-media; gyroscope; picture-in-picture; web-share" allowfullscreen></iframe>
</div>
</div>

<div class="swiper-slide">
    <div class="youtube_box">
<iframe width="560" height="315" src="https://www.youtube.com/embed/rsTOy_RLPvo" title="YouTube video player" frameborder="0" allow="accelerometer; autoplay; clipboard-write; encrypted-media; gyroscope; picture-in-picture; web-share" allowfullscreen></iframe>
</div>

    </div>

    </div>
  <!-- 必要に応じてページネーション -->
  <div class="swiper-pagination"></div>
  <!-- 必要に応じてナビボタン -->


</div>


<div class="swiper-button-prev"></div>
  <div class="swiper-button-next"></div>

</div>
    
</div><!-- /.youtube_swipwe_wrap -->


CSSはベースのスワイパーが効いてる

ヘッダー

<link rel="stylesheet" href="<?php echo get_stylesheet_directory_uri(); ?>/2_head/swiper/swiper-bundle.min.css"/>

それを、各wrapで囲んだlessで変更する。

.youtube_swipwe_wrap{

///pre nextを外に出すため囲む
.swiper_wrap_wrap{position: relative;
  max-width: 92%;
  margin-left: auto;
  margin-right: auto;
}
//cssで位置移動
.swiper-button-next, .swiper-rtl .swiper-button-prev {
  right: -40px;
  @media screen and (max-width: 736px){
      right: -30px;
  }//@media screen 736px
}
//cssで位置移動
.swiper-button-prev, .swiper-rtl .swiper-button-next{
  left: -40px;

  @media screen and (max-width: 736px){
      left: -30px;
  }//@media screen 736px
}

//矢印の色替え
.swiper-button-next,
.swiper-button-prev {
  --swiper-navigation-color: #858585; //ここに変更する色を指定
}

//youtubeiframe

.swiper_wrap_wrap{

  .youtube_box{width: 100%; aspect-ratio: 16 / 9;

      display: grid;


      @media screen and (max-width: 736px){
          width:100%; 
      }//@media screen 736px

      iframe {
          width: 100%;
          height: 100%;
      }
  
  }


}


.swiper-wrapper {
  /* wrapperのサイズを調整 */
  width: 100%;
 // height: 300px;

  
}

.swiper-slide {
  /* スライドのサイズを調整、中身のテキスト配置調整、背景色 */
  color: #ffffff;
  width: 47%;
  height: 100%;
  text-align: center;
  //line-height: 300px;
  margin-right: 1.5%;
  margin-left: 1.5%;

  @media screen and (max-width: 736px){
//1個fだとページ送りで隙間ができるから
      margin-right: 0%;
      margin-left: 0%;

  }//@media screen 736px
  
}

}

こんな感じ 以上 これで、それぞれのスワイパーをコントロールできる
フィルター メモ

&.bokashi{ 
 .tw100_bg_img{
         img{
     filter: blur(3px);//ぼかし
 }
 }
 }
 &.saido{

     .tw100_bg_img{
         img{
       filter: saturate(80%);//彩度
 }
 }

 }
 &.bright{
     .tw100_bg_img{
         img{
 filter: brightness(130%);//輝度 明るくなる
         }
     }
 }

 &.contrast{
     .tw100_bg_img{
         img{
             filter: contrast(200%);//コントラスト 明るくなる
         }
     }
 }

 &.gray{
     .tw100_bg_img{
         img{
             filter: grayscale(100%);//モノクロ 彩度と反対
         }
     }
 }

 &.sepia{
     .tw100_bg_img{
         img{
             filter: sepia(88%);//セピアカラー
         }
     }
 }


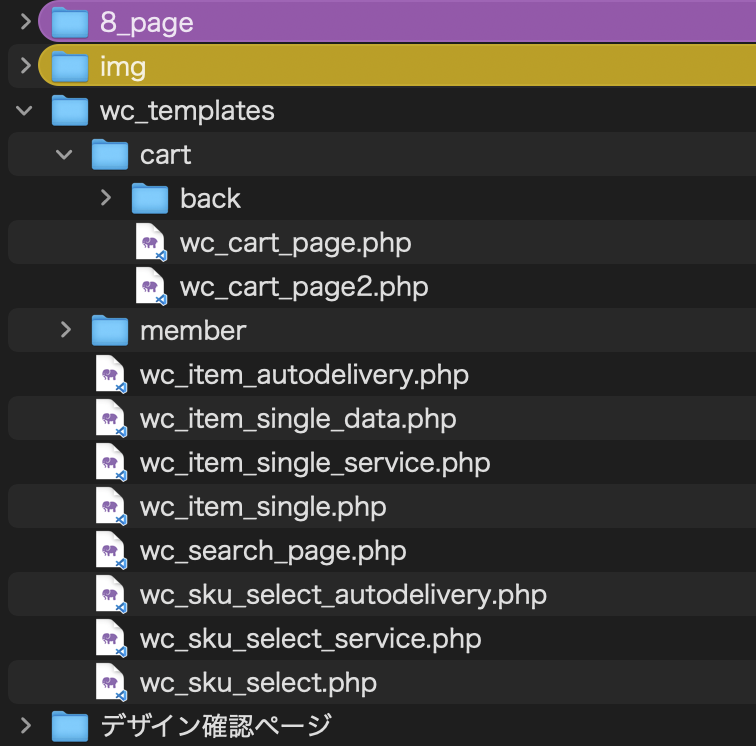
welcart テーマファイル

welcart テーマファイルの問題点、

テーマフォルダ内に

wc_templates

を作成、その中に

cart

member

その他ファイルで稼働するが、

多分、welcartがプラグインフォルダからか、一度取得するためか、

サイト特有に持たせてあるカスタムフィールド値を持っていない。

試しに、

wc_templatesの中のwc_cart_page.phpのスタートに

$footer_sale=”12″;

と持たせても、

ヘッダーで処理される$footer_saleな分岐が稼働しない。ないですよとなる。

admin_siteで作った色々なセッティングを読み込みできないので、

wc_cart_page.phpを

<?php include(get_stylesheet_directory(). "/4_custom/welcart/page_welcart.php"); ?>

/4_custom/welcart/page_welcart.phpを

<?php 

include(get_template_directory() . "/func/admin_site.php");

//welcart のカテゴリ
$welcart_cat= 877;
$welcart_cat_out= -877;

$itemreco = 878;
$itemnew = 879;

//商品ジャンルのカテゴリ
$welcart_genre= 880;

$souryou_muryou = '4400';


include(get_template_directory() . "/5_head/d_0_header.php");?>


<body id="welcart_body" class="welcart_top">

と始めたらなんとか動いた。


ただ、カート内のテンプレートはすべてのページ作る必要がある

また、シングルもこれで作らないと、

skuセレクト

商品バリエーション プラグイン

もつかえなさそう?

welcart バージョアップ時

まずはカートページがリセット

templates/cart/cart.php/カート
税込み表示 追加
        </tr>';
    
    //税込み 追記	
     $total_price = usces_total_price('return') - usces_order_discount('return');
    $tax = $this -> getTax( $total_price );
    
    $cart_table_footer .='
    <tr>
    <td class="num">&nbsp;</th>
    <td class="thumbnail ">&nbsp;</th>
        <td colspan="3" class="aright">'.usces_tax_label(array(), 'return').'</td>
        <td class="aright">'. usces_crform($tax, true, false,'return').'</td>
        <td class="stock">&nbsp;</th>
            <td class="action">&nbsp;</th>
    </tr>

    <tr>
    <tr><th class="num">&nbsp;</th>
    <th class="thumbnail">&nbsp;</th>
        <th colspan="3" class="aright">税込合計<em class="tax">(税込)</em></th>
        <th class="aright">'.
        usces_crform(($total_price + $tax), true, false, 'return'). '</th>
       <th class="stock">&nbsp;</th>
            <th class="action">&nbsp;</th>
    </tr>';

        
    //ここまで 	
    $cart_table_footer .='	</tfoot>
    </table>';

さらにシングルページもデフォルトカートが出現

templates/single_item.php を

<?php
    $html .= $content."\n";

?>


その他は変える必要なかったが、

過去色がついていたファイル

confirm.php はポイント??使ってないんで未確認 違いがなかった

usces_cart.cssも色ついてるけど??

けんしょうすると、welcart.less にて上書きしているようで、今はいらないようだ。

施工例 いれる 入れる 流れ 自分テーマ

チルドのファンクにて 整理 newびるど

// KEN設計 事例
require_once locate_template('4_custom/newlybuilt/newlybuilt_func.php');

カテゴリのみ built-chiiki/愛知県/

となってる

\その他スラッグ上書きできる


ほぼ、テーマ変更による 不具合ばかりだったが、

今回は入れ込んでないcssをクライアントlessに書き込んだのであとで、整理


また、flickSlider2.jsを利用しており、

1500に対応させた。


その際、carが効いていて、そのおかげで、うまく表示できていた部分があったので、

ba_sekou.lessに追記 また、carなしでも表示できた

carの表記では1500に対応できなくなるので、max hight削除する

スマホでクロームのみ分岐させ、cssを適用する

if_mob_chorome.css

@charset "utf-8";


.footer_call .flex_wrap {padding-bottom: 12px;}

if_mob_chorome.php

<script>

var path = "<?php echo get_template_directory_uri(); ?>";

var userAgent = window.navigator.userAgent.toLowerCase();
    
if(userAgent.indexOf('msie') != -1 || userAgent.indexOf('trident') != -1) {
    //IE向けの記述
}else if(userAgent.indexOf('edge') != -1) {
    //旧Edge向けの記述
}
else if(userAgent.indexOf('chrome') != -1) {
        // //Googleクロームへの処理
        // var d = document;
        // var link = d.createElement('link');
        // link.href = path + '/if_mob_chorome.css';
        // link.rel = 'stylesheet';
        // link.type = 'text/css';
        // var h = d.getElementsByTagName('head')[0];
        // h.appendChild(link);

}
else if(userAgent.indexOf('crios') != -1) {
        //iOS Googleクロームへの処理
        var d = document;
        var link = d.createElement('link');
        link.href = path + '/if_mob_chorome.css';
        link.rel = 'stylesheet';
        link.type = 'text/css';
        var h = d.getElementsByTagName('head')[0];
        h.appendChild(link);

}

else if(userAgent.indexOf('safari') != -1) {
    //Safari向けの記述
}else if(userAgent.indexOf('firefox') != -1) {
    //FireFox向けの記述
}else{
    //その他のブラウザ向けの記述
}


</script>


ヘッダー

<?php ////////////////////////上書きcss ブラウザで判別
include(get_template_directory() . "/5_head/if_mob_chorome.php"); ?>

参考

path +

https://zenn.dev/itooo_web/articles/8d37f720e73c98


https://kaworu.jpn.org/kaworu/2008-05-24-2.php


ここに複数 でもうごくか?

外部CSSファイルをJavascriptから読み込む方法


https://arts-factory.net/useragentbrowser/

my_lazy_lode loading=”lazy”が効かないからさ

<div class="ggmap2 my_lazy_lode ">
<iframe loading="lazy" src="https://www.google.com/maps/d/embed?mid=1u1_RQyQSZ0TKAJhA_6oCqqUjPHQm3TSx&ehbc=2E312F" width="640" height="480" ></iframe>
    </div><!-- /.ggmap -->
.my_lazy_lode{display: none;
 &.on{display: block;}
 }

display: noneしたコンテンツ内のgooglemapはロード時に読み込まれないので、ページ表示速度が上がる

フッターにこれも追加

//なんでも使えるように .my_lazy_lode が画面に入ったら onがつく  .my_lazy_lode.on
$('.my_lazy_lode').each(function(){
    var elemPos = $(this).offset().top;
    var scroll = $(window).scrollTop();
    var windowHeight = $(window).height();
       
     // スマートフォン向けの記述
if (navigator.userAgent.indexOf('iPhone') > 0 || navigator.userAgent.indexOf('Android') > 0 && navigator.userAgent.indexOf('Mobile') > 0) {
        if (scroll > elemPos - windowHeight - 500){
     $(this).addClass('on');
    }
       
    // タブレット向けの記述
} else if (navigator.userAgent.indexOf('iPad') > 0 || navigator.userAgent.indexOf('Android') > 0) {
        
        if (scroll > elemPos - windowHeight - 500){
     $(this).addClass('on');
    }
} else {
        // PC向けの記述
        if (scroll > elemPos - windowHeight - 500){
     $(this).addClass('on');
    }
}


   } );

//